

How To Fix Brightness Problem On Windows 7
Four quick means to fix the everlasting Laptop brightness problem in Ubuntu.
Yous are reading: four Ways to Fix the Laptop Brightness Trouble In Ubuntu
Ubuntu plus nearly of the Linux distributions always had issues with Laptop brightness. The default hardware controllers never in the Laptop keyboard worked near of the time afterward a fresh install.

Follow below definite steps that worked till now for about of the Laptop based on feedback on this website at our old article.
The described methods worked for the beneath models (so far). For the complete list of Laptops/Desktops where either of these 4 methods worked, refer to the list at the lesser of this article.
- ASUS G75-VW
- Dell Vostro 3000 Series
- Samsung RV411 Serial
Prepare the Laptop Brightness Problem In Ubuntu
Method 1: Gear up Effulgence Enabling Laptop Specific Drivers
- Open the file
/etc/default/grubusing gedit or any other text editor.
Notice the below line.
GRUB_CMDLINE_LINUX_DEFAULT="placidity splash"
- Alter in a higher place line to:
GRUB_CMDLINE_LINUX_DEFAULT="quiet splash acpi_backlight=vendor"

This would ensure to load device specific drivers before default drivers in Linux.
- Save the file and close the text editor.
- Open the terminal and run the beneath control.
update-chow
- Reboot.
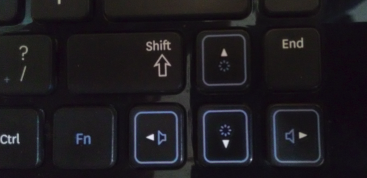
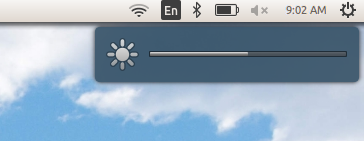
After reboot, try adjusting the effulgence using Laptop dedicated control keys.
Method ii: Fix Effulgence Using a Software
If the higher up method did not work, you can try beneath method using an app.
This app chosen 'Brightness Controller' is capable to control display using a elementary GUI. It supports multiple displays as well.
The app is available in PPA. You can run below command to install it Ubuntu sixteen.10 Yakkety Yak, Ubuntu sixteen.04 Xenial Xerus, Ubuntu 18.04 LTS, Ubuntu 20.04 LTS.
sudo add-apt-repository ppa:apandada1/brightness-controller sudo apt update sudo apt install brightness-controller
For other download options, you lot can refer to this folio.
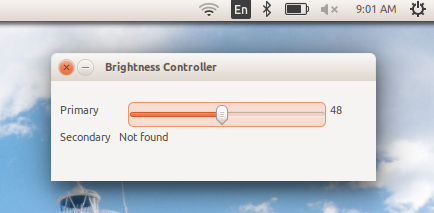
After install, you can find it under the application menu or search information technology in Nuance. Once opened you can see a bar that controls the display brightness which you can arrange every bit per your need.
Article mail on: us.suanoncolosence.com
- Read likewise:
- How to Install Nginx Web Server on Ubuntu twenty.04
- Linux SCP Command Explained: Deeply Copy & Transfer Files {13 Examples}
- How to Disable SELinux on CentOS viii
- Acquire to debug lawmaking with the GNU Debugger
- How to Use Git Version Control System in Linux [Comprehensive Guide]
Method 3: Set up Brightness by configuring X11
Follow this method if none of the above fixes piece of work. This should be the concluding resort.
Open a terminal session. So browse to the X11 config file path /etc/X11/xorg.conf.d
cd /etc/X11/xorg.conf.d
If you practise not find any file in the higher up path, then check the below path for the configuration. This is mainly for those systems where you have logged in equally a local user and not a root user.
cd /usr/share/X11/xorg.conf.d
Then listing the files via ls. Yous can see something like below.
ls
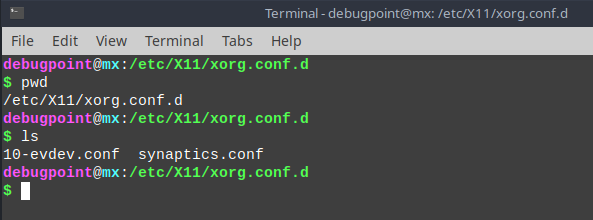
For this case, you can see information technology has a file named 10-evdev.conf. For your system, information technology might exist different. And so open up the file via test editor as root.
Source: us.suanoncolosence.com
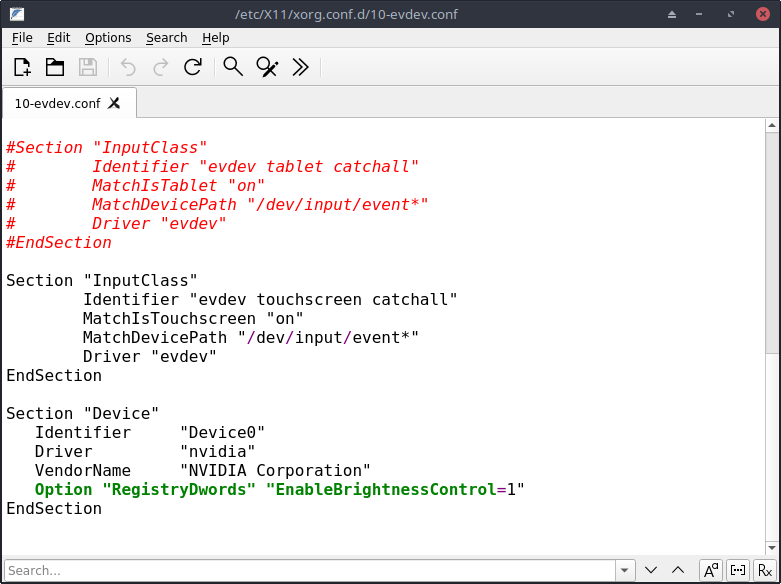
sudo gedit /etc/X11/xorg.conf.d/10-evdev.conf
Add below lines entirely at the end of this file and save the file.
Section "Device" Identifier "Device0" Driver "nvidia" VendorName "NVIDIA Corporation" Option "RegistryDwords" "EnableBrightnessControl=ane" EndSection
Sample file beneath:
Once yous are done, restart the organization.
You should be able to command the brightness now using the laptop hardware keys.
Method iv: Ready Brightness using xrandr
If none of the to a higher place methods give you hope, and so try the following method. This uses xrandr'southward properties, which is the official config utility for X server Resize and Rotate.
Via @: us.suanoncolosence.com
- Read more:
- How To Run SpeedTest From The Linux Terminal
- Установка и использование Docker в Ubuntu 20.04
- How to dual boot Windows eleven and Ubuntu
- How to Install PHP 7.4 on Ubuntu 20.04 LTS
- How To Run Windows Applications On Linux [Beginners Guide]
Open a terminal and discover out the proper noun of your brandish using the beneath control. In the below screenshot, you lot tin can see two outputs because in my test organization two displays are there.
xrandr | grep " connected" | cut -f1 -d " "
Then, side by side is to change the brightness using the display proper noun. So, employ the post-obit command by changing the monitor name. In this case I accept used eDP-1 which is my organisation'southward display. The brightness value range is 0 to one, where 0 is the dimmest and one is the brightest.
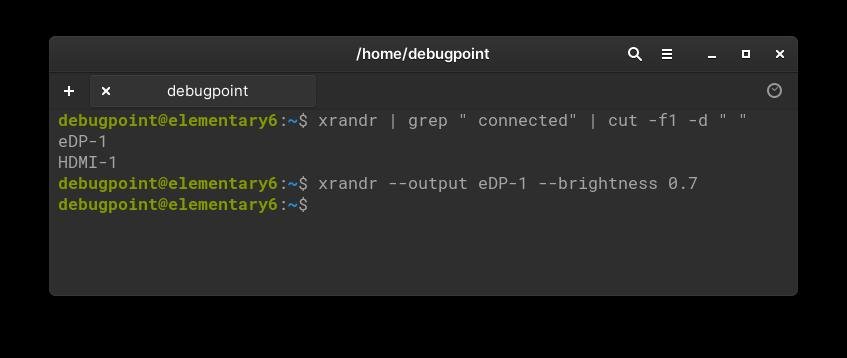
xrandr --output eDP-1 --brightness 0.vii
To revert, you tin can use the above command with brightness=1.
Drop a comment if any of these methods worked for your laptop. Don't forget to mention your Laptop model for the benefit of others.
Above methods are tested and working well in below Ubuntu releases:
- Ubuntu xvi.04 LTS, Ubuntu 17.10, Ubuntu 18.04 LTS, Ubuntu xix.x, Ubuntu 20.04 LTS
List of hardware (Laptops, Desktops) where either of the to a higher place method worked till now (updated June 2020):
- Toshiba C-665
Toshiba Tecra A9-S9016X - Dell Vostro 3000 Series
Dell Latitude E6530
Dell XPS 15 - Samsung RV411 Series
Samsung Notebook NP370R5E - Intel HD4000
Acer Aspire 5810
Lenovo G580
LG P430
HP Pavilion G Serial
Gigabyte Aero15 - ASUS G75-VW
- ASUS K52F
We bring the latest tech, software news and stuff that matters. Stay in impact via Telegram, Twitter, YouTube, and Facebook and never miss an update!

Article post on: united states.suanoncolosence.com
Category: Linux at https://us.suanoncolosence.com.
Source: https://us.suanoncolosence.com/how-to-fix-brightness-keys-not-working-in-ubuntu-1654940399
Posted by: volpesether90.blogspot.com
0 Response to "How To Fix Brightness Problem On Windows 7"
Post a Comment